STEP 1:
Create Your App
Create Your App
You can configure your Amazon Creator app using a YouTube channel as the source for your video content. YouTube approach gives you a robust, free platform for hosting and serving your video. You can group your videos into different channels within the same account. Amazon Creator requires you to supply a developer API key in order to access the videos.
Amazon Creator displays all the videos contained within a specific YouTube channel. You need your Channel ID to configure Amazon Creator. To get your Channel ID:
Copy the value for the YouTube Channel ID.
You can also view get your channel ID by viewing your channel (click your avatar and then click My channel). Your channel ID appears in the address bar after channel/ until the ?, as shown in the following image:

Amazon Creator needs an API key in order to access your YouTube videos. To get the API key:
In the Select dialog box that opens, click the + (plus) button on the right to create a new project:

After the project gets created, in the left sidebar, click the Credentials tab:

Click the blue Create Credentials drop-down menu and select API Key.

Save your API key in a convenient location because you will need it when you configure Amazon Creator.
Type youtube in the search box, and then select YouTube Data API v3.

Click Enable.
Note that you can use the same API key for each Fire TV app you create (assuming each channel belongs to the same YouTube account).
By default, Amazon Creator gets all the videos from your YouTube channel. If you want all the videos (actually, the last 50) in your channel to appear in your app, great, leave all the videos in your channel as is.
If you only want a subset of videos in your channel included in your app, you have two options:
After you create your app, you can edit your app and block videos from appearing in the app by specifying the video IDs you want to block.
= sign. For example, if the URL of your video is https://www.youtube.com/watch?v=v49lSRT6-FY, the video ID is v49lSRT6-FY.In the "Blocked Videos" section, enter the video ID in the Video ID to block box and click Block Video.

You can create another channel (within your same YouTube account) that includes only the videos you want in your Fire TV app. To create additional channels:
Click + Create a new channel.
If you created your YouTube channel before 2014, you may not see options to create a new channel until you first create a "brand account." Follow the links to create a brand account. (Newer YouTube channels already offer the ability to create multiple channels without first establishing a brand account.) See Channels migrated to Brand accounts for more details.
Upload the videos you want into this channel. (You can't simply transfer videos from one YouTube channel to another.)
You can transfer the videos by first downloading your videos from one channel and then uploading them into another channel. To download a video, click your avatar in the upper-right, select Creator Studio, then expand VIDEO MANAGER in the left sidebar. Click the drop-down arrow next to a video and select Download MP4. After you transfer videos across channels, delete the videos from the old channel so you don't have duplicate video content across channels. See Manage multiple channels for more details.
Now that you have multiple channels, you can configure your Fire TV app with the channel ID you want.
By default, the Latest option in the app's category navigation bar shows the 50 most recent videos in your YouTube channel. You can group your videos into different playlists, and then assign the playlists into different sections in your YouTube channel. The category navigation bar in Amazon Creator will list each of the sections in your YouTube channel.
For example, in the following screenshot, videos are grouped into Car scenes, Trail scenes, and Water scenes:

(The "About" page contains required attributions for using the YouTube API service. You cannot remove the About page or add additional pages to this menu.)
Each of these category navigation options is a "section" on the YouTube channel page. Each section is configured to display a playlist.
To group your videos into different playlists in your YouTube channel:
To add a video to a playlist, in the left sidebar, expand VIDEO MANAGER and select Videos. Select the check box next to a video, and then click the Add to button at the top and select the playlist you want to add the video to. See Create & manage playlists for more details.

To assign your playlists to different sections in your YouTube channel:
In the CHOOSE A PLAYLIST section that appears, in the drop-down selection on the right, click Find playlist… and select the playlist you want for that section. Then click Done. (If your playlist doesn't appear, you may need to specify the playlist by inserting the URL to the playlist.) Repeat for each section you want to add.

For more details, see Customize channel layout and Organize content with channel sections.
Note that YouTube allows you to add a variety of section types to your channel, but not all section types will display in your Amazon Creator app. The following are the section options available in YouTube:

Only the following section types will appear in your Amazon Creator app:
Other section types will be ignored by Amazon Creator.
Your channel's homepage needs to have some video content in order for the "Latest" option in the app's category navigation bar to populate with content. If no content appears on your channel homepage, your app will show a "No Content Found" message to users, or worse, your app may generate a playback error.
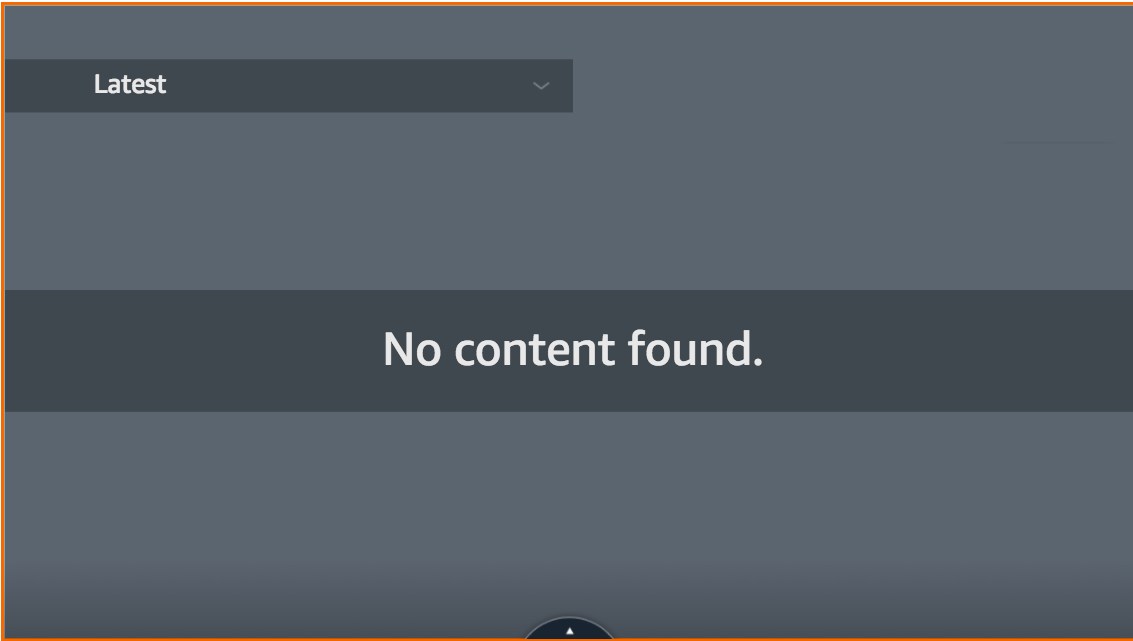
To avoid this scenario, add some video content on your channel's homepage by following the instructions in the previous section, Group Videos into Playlists in Your App's Category Navigation Bar.
However, if you have valid reasons for omitting video content from your channel's homepage, you can hide the "Latest" option from the category navigation bar. To hide the Latest category:
If you hid your YouTube channel, you need to re-enable the channel to use it with Amazon Creator.
After you create your app, go on to Step 2: Preview Your App.
© 2018 Amazon, Inc.